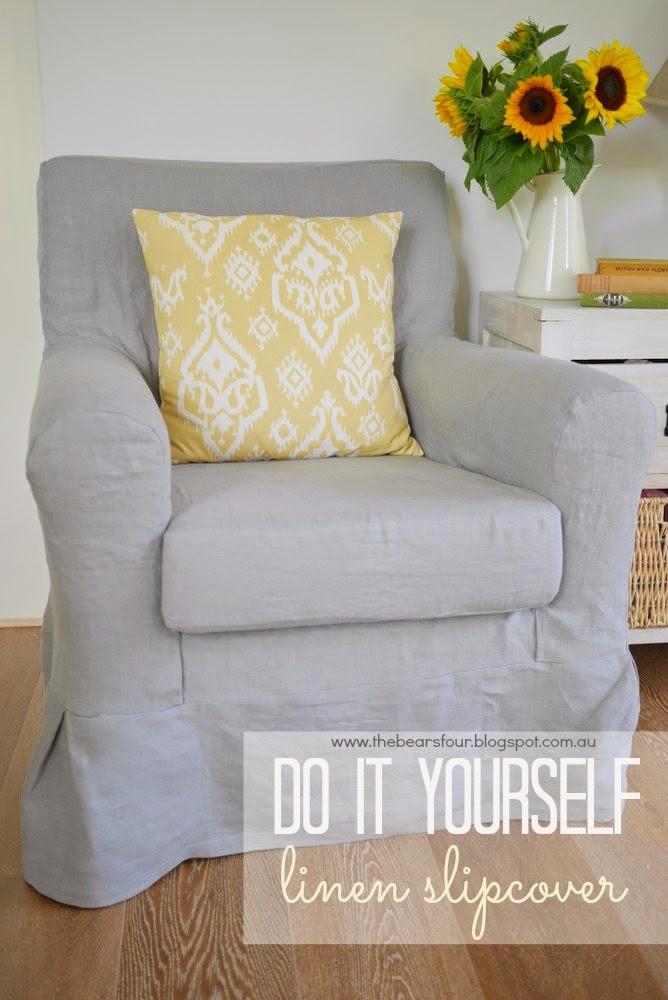
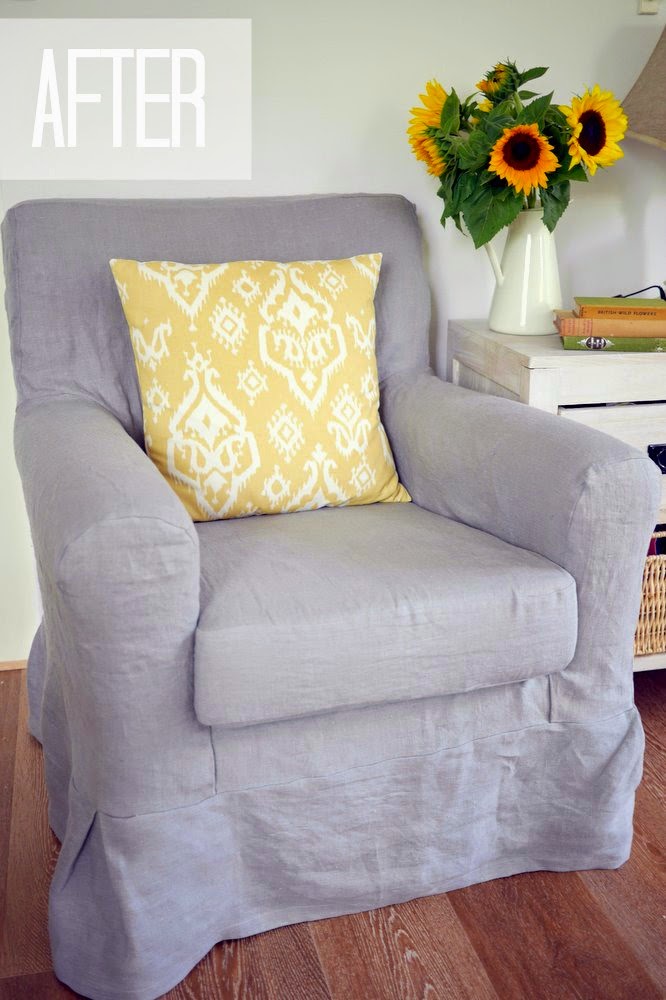
I love Ikea as you can probably tell from all the Ikea mentions I've had on the blog, but we rarely keep our Ikea furniture as Ikea intended them to be. We pretty much hack everything we purchase from there but one thing I never got around to making my own, was an Ikea Ektorp Jennylund armchair that we bought in the as is section about seven years ago. It hadn't come with a slipcover but it needed one, so we just bought the plainest and cheapest one. I've been wanting to buy a light grey linen slipcover for awhile now and found ones here and here, but we really couldn't afford the price tag. So when Ikea came out with an affordable linen fabric, I decided I'd take the leap and make my own slipcover. For a step by step and before and after pictures, click below.
I knew I wanted a very relaxed Hampton's style slipcover, which works well when making your own slipcover because it means not having to have an exact tight fit or piping around the seams. I also never liked that the Ikea slipcover for this chair doesn't reach all the way to the floor so if storing anything under the chair, it's visible. Since our apartment is 63m2 we store things under all our furniture and a chair skirt that went all the way to the floor was a necessity!
I started by taking a trip to Ikea and purchasing enough fabric to make the slip cover, also taking into account that linen has about 5% shrinkage when first washed so I ended up getting 5.5 metres which was perfect and at around $60, way cheaper than buying a new slipcover. To make a slip cover you'll also need:
- Sewing machine
- Matching thread
- 55 or 60cm Zipper (for cushion slipcover)
- Butcher paper
- Pins
- Pencil
- Scotch Guard
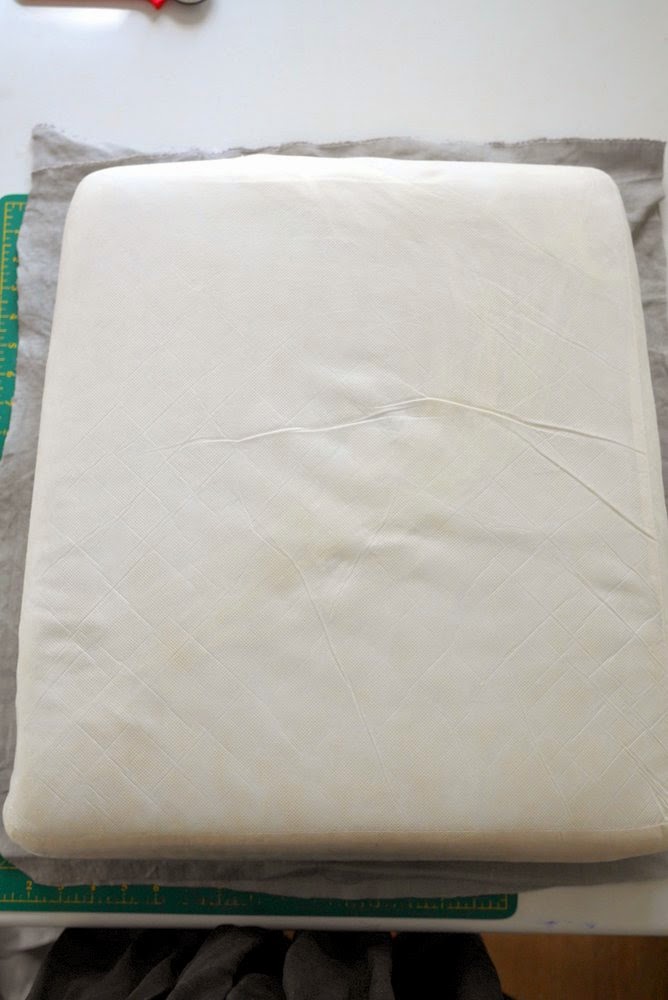
Step 1: Wash, dry and iron your fabric. Next decide what method you want to use for making the slipcover. Either pin the fabric directly onto the chair for making each pattern piece or use butcher paper to mark out the pattern pieces and then cut out the fabric. I tried the first method for the seat cushion and though it was quicker than drawing out a paper pattern first, I found that it didn't give me as clean of a line as I wanted, so I switched to using butcher paper and carefully marking out each pattern piece first on the chair with paper and then cutting the pattern out with the fabric. I used my existing slipcover as a guide for where I wanted my seams to go.
 |
First method of cutting rough pattern pieces and pinning directly onto the chair cushion.
I found that this method also had more fabric wastage. and the seams weren't as straight.
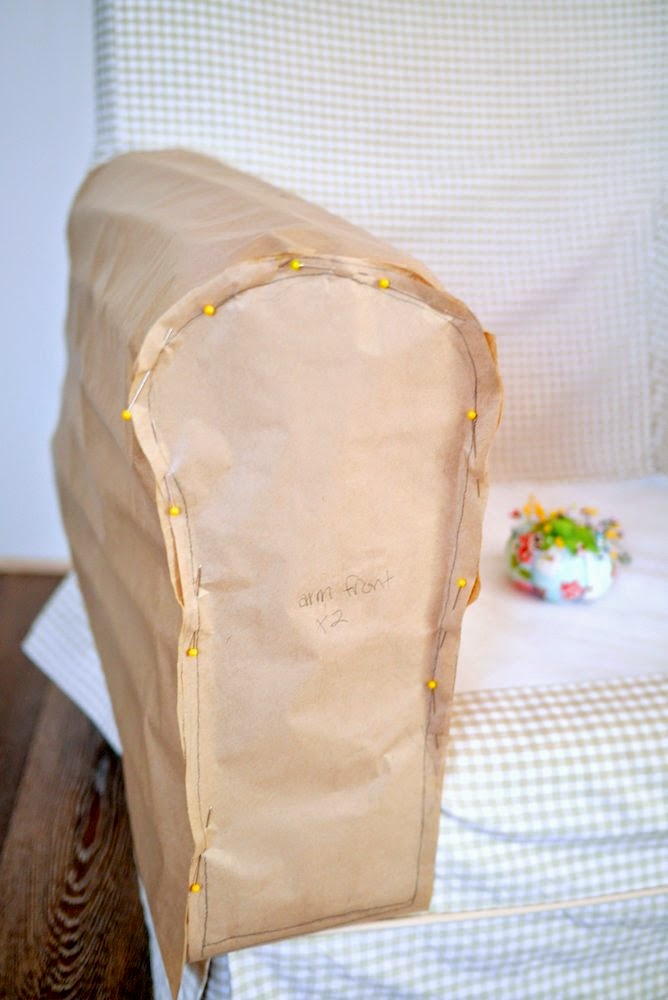
I switched to using butcher paper to make pattern pieces, which was more time consuming but it gave me a nicer fit and I was able to use my fabric meterage more efficiently.
|
If using the butcher paper method, make sure to trace around each seam exactly and then add 2-3cm seam allowance, more if you want a relaxed fit.
Step 2: After all of your butcher paper pattern pieces are complete, lay them out onto your fabric, making the best use of space so you have as little fabric wastage as possible. Once you're happy with how your pieces are laid out, pin them to the fabric and then cut out your fabric pattern pieces.
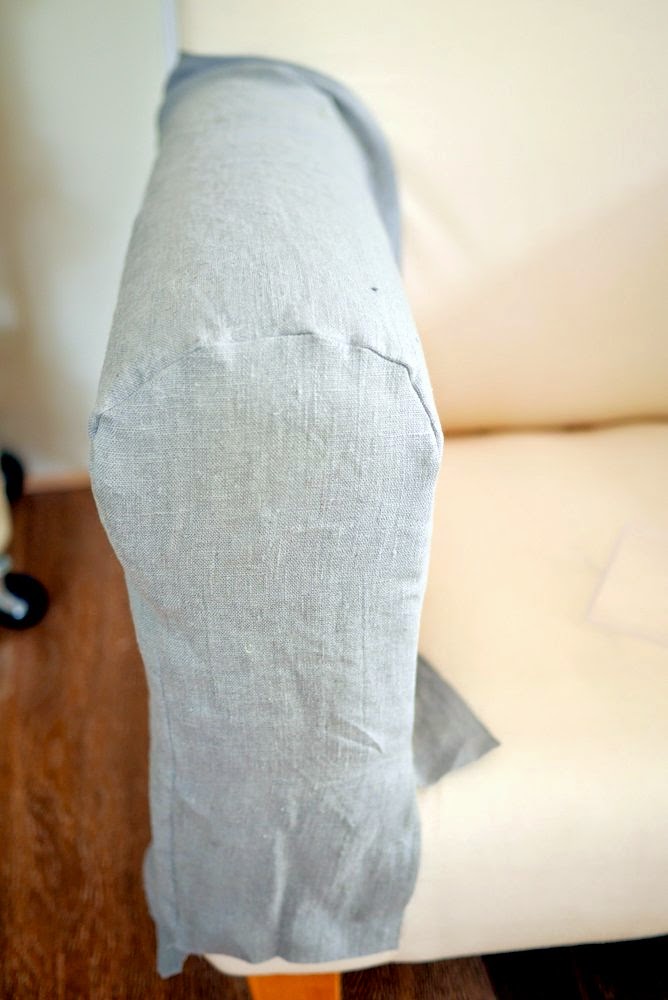
Step 3: Begin by pinning each fabric piece onto your chair by section. Sew one section and then add on another, like you're putting together a puzzle. I started with the arms as I found this the most logical place to start but start wherever you find easiest.

Once you've pinned your pieces together (remember right sides facing into the chair if using a fabric with a right and wrong side -luckily it doesn't matter with linen so one less thing to think about!) and you're happy with the fit, take the fabric off the chair (keeping the pieces you want to sew pinned together) and using you're sewing machine, sew along the pinned line. I double stitched my pieces together since I knew that the weight of people sitting on the chair required the seams to be more durable than if I was sewing a dress. I also finished off the edges by sewing them together with a tight zigzag stitch so the fabric ends wouldn't fray the next time I washed the slipcover.
Step 4: Once you've sewn the pieces together, turn the fabric right side out and slip it back over the chair to check that everything lines up and you're happy with how it looks.
Continue with this process, adding piece by piece until you've sewn all the pieces together. It may take a bit longer but take the time to always turn your slip cover right side out after adding each piece to make sure everything is fitting together nicely. It's much easier to redo a section right after you've sewn it, then have to take several sections out to fix a problem. Luckily the butcher paper pattern pieces were fairly accurate and for once the seam ripper never made an appearance.

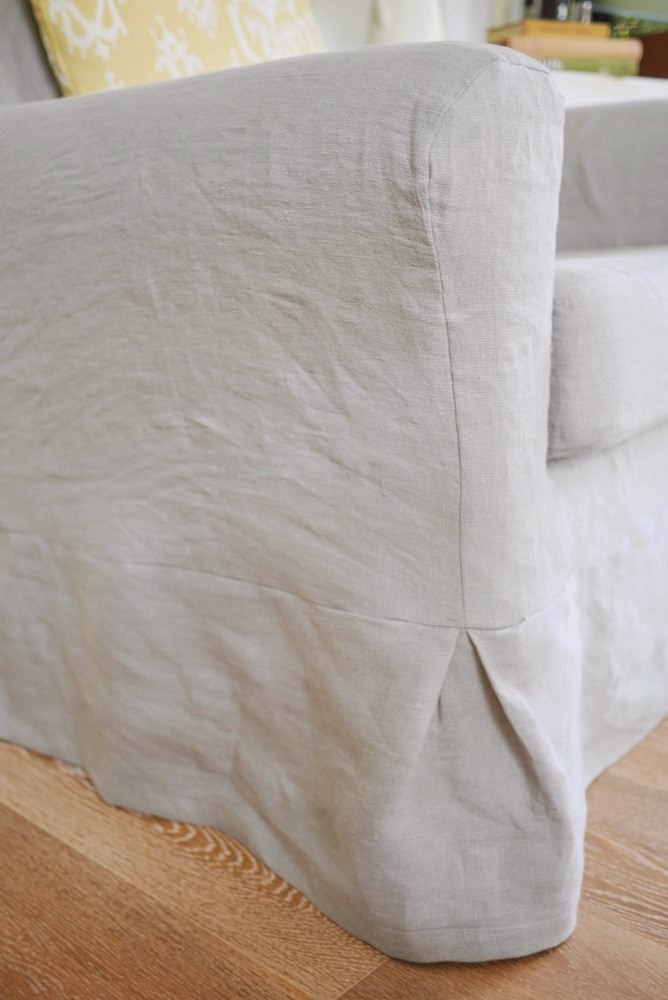
Step 5: Once the cushion and chair slipcovers are complete, measure the length of the bottom of the chair to the floor to determine the fabric piece you'll need to make the skirt. I wanted a simple clean pleat at each corner of the chair skirt so I add 14cm x 4 corners to the length of my skirt, which gave the skirt the perfect amount of fullness. Once you've cut out the skirt fabric, hem one length (which will be the skirt side closest to the floor) and then pin the non hemmed long length of the skirt to the main chair slip cover, making sure to add a pleat to each corner. Sew the skirt to the chair slip cover. Turn the completed cover right side out and iron (though linen becomes wrinkled fairly quickly, it is still a good idea to at least iron the seams to finish it off).
Step 6: Scotch guard the slipcover according to the directions on the bottle.
Done! Now's it's time to make a cup of tea, grab a book and enjoy relaxing in you 'new' armchair.

Happy Sewing!
Beautiful work!
ReplyDelete